De la Toison au Tricot n° 128 : Bricoler soi-même une planche à mélanger
The latest issue of Spin-Off has just arrive. And everyone is talking about it !
In particular, everyone is talking about the article by Gwen Powell on using a fiber blending board.
Le dernier numéro de la revue Spin-Off est arrivé. Et tout le monde en parle !
C’est surtout l’article de Gwen Powell sur la planche à carder et à mélanger les fibres qui fait parler tant de fileuses !
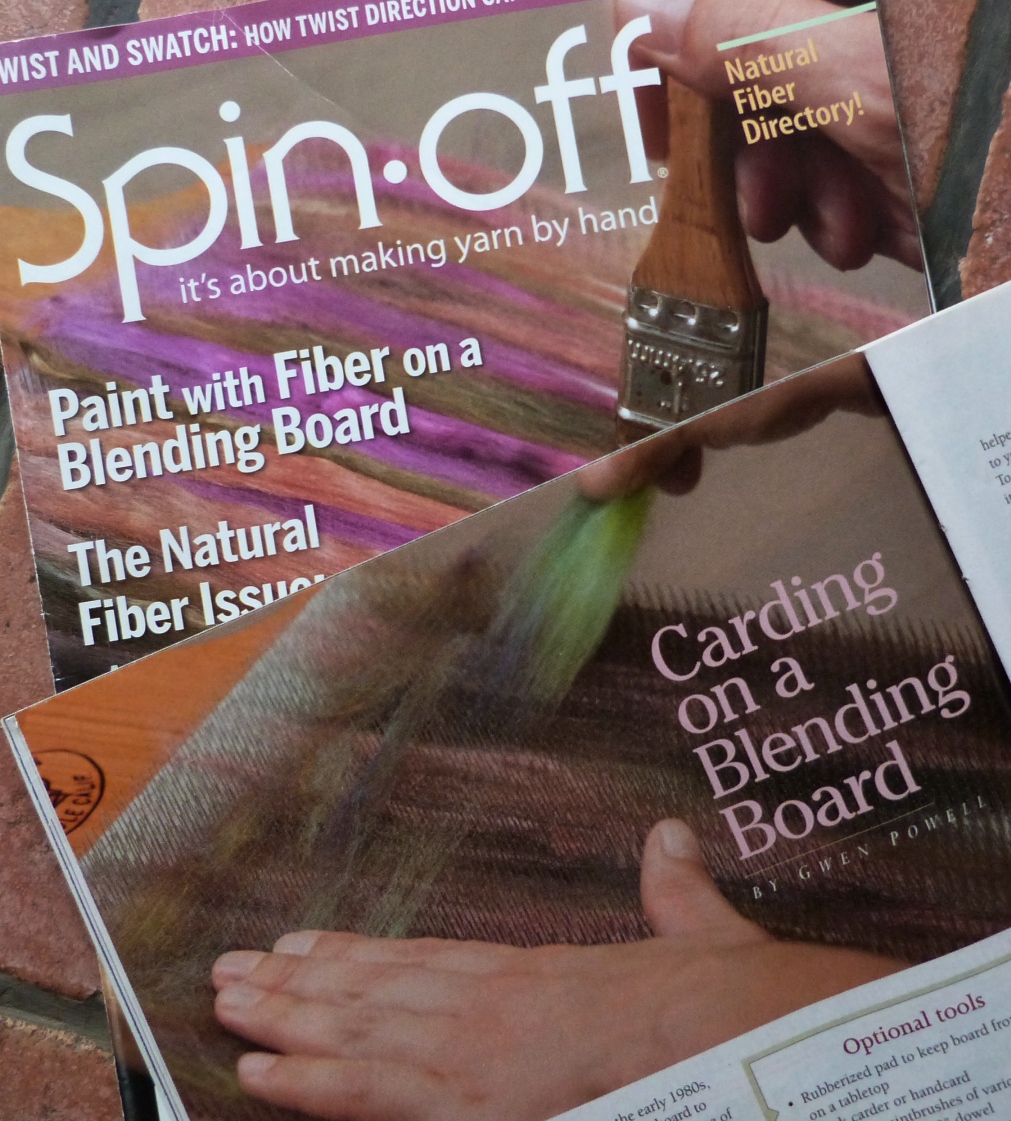
Essentially, Powell introduces us to a “new” fiber tool that is of potential interest to both experienced and new spinners alike.
It must be said that it does look quite impressive. And I have to admit that I’m really tempted by the idea of working with this new fiber toy.
That being said, I personally find this little “fiber toy” to be rather pricey. Over $200! And let’s not forget about the cost of shipping to France, which would most likely be between $30 to $40.
That’s getting to be a pretty expensive little toy! More than a set of wool combs !
Yet this marvelous little blending board is actually just a bit of carding cloth attached to a simple piece of wood.
In other words, one would think that any spinner who is a bit of a DIYer should be able to make her own blending board.
Now it must be said that this Spinning Shepherd is a real DIY girl. So, of course, I just had to have a go at making my own blending board.
To make this project, you will need :
-
a wooden board that measures approximately 10″ x 14″ … for example a nice cutting board
-
a piece of carding cloth (9.5″ x 12″)
-
glue and staples
For the wooden board, I used a lovely bamboo cutting board. Of course the glue and staples can be purchased in any hardware store.
As much as the board itself, as well as the glue and the staples, are easy enough to find, the same can’t be said about the carding cloth. Additionally, carding cloth is next to impossible to find in France.
Fortunately, we can buy carding cloth from Natural Fiber Yarns on etsy. This carding cloth is 9.5″ wide and can be cut and sold in the length that you require. (You need to send a message to Amy to let her know what you’re looking for.)
But just be aware that carding cloth isn’t cheap ! You need to count on spending approximately $50 for a 12″ piece of carding cloth.
At the same time, keep in mind that carding cloth comes in a number of different TPIs (that’s Tines per Inch!). Generally speaking, most blending boards use either 72 or 54 TPI carding cloth.
That said, in so far as I like working with silk, alpaca, Ouessant and other fine fibers, I decided to order 90 TPI carding cloth. We’ll have to see if I made the right choice or not.
I ordered a 12″ piece of carding cloth.
One week later, my carding cloth arrived in the mail.
Effectivement, Powell nous présente un “nouvel” outil susceptible d’intéresser pas mal de fileuses averties. Ce qu’on peut faire avec est quand-même très impressionnant. Et, je l’admets, je suis plus que tentée par l’idée de travailler avec un tel outil.
Pourtant, le prix de ce nouveau “joujou” me semble plutôt exagéré : plus de 200 dollars américains! Et n’oublions pas qu’il faut y ajouter le prix de la livraison en France … disons au moins $30 à $40. Ça additionne très vite ! C’est bien plus qu’une paire de peignes à laine !
Pourtant, cette fameuse planche à mélanger n’est qu’une simple planche en bois (de la taille d’une planche à hacher) munie d’un morceau de revêtement à dents utilisé pour carder la laine. Bref, on dirait que bricoler soi-même une telle planche à mélanger est à la portée d’une fileuse-bricoleuse.
Il faut vous dire que la Bergère-Filandière est une femme bricoleuse. Alors, je me suis lancée dans la fabrication d’une planche à mélanger.
Pour réaliser ce projet, il faut :
-
une planche en bois qui mesure environs 26 cm x 35 cm … par exemple une belle planche à hacher !
-
un morceau de revêtement à dents pour carder la laine (24 cm x 30 cm)
-
colle et agrafes
Pour la planche en bois, j’ai utilisé une belle planche à hacher en bambou. Quant à la colle et aux agrafes elles s’achètent dans un magasin de bricolage.
Si la planche elle-même, ainsi que la colle et les agrafes sont facile à trouver, le revêtement à dents, qui est d’ailleurs très spécialisé, s’avère assez difficile, voir impossible, à trouver en France.
Heureusement, nous pouvons acheter ce revêtement à dents chez Natural Fiber Yarns sur etsy. Le revêtement à dents est offert en 24 cm de largeur et peut être “coupé et vendu” à la longueur voulue. (Il faut s’adresser à Amy pour préciser quelle longueur on cherche). Mais attention, ce revêtement n’est pas donné ! Il faut compter à peu près 50 euros pour 30 cm, y compris les frais de livraison.
D’autre part, il faut savoir que ce revêtement se présente en plusieurs “TPIs”. Effectivement TPI vaut dire “Tines per Inch” … ou dents par 6,45 cm². Normalement les planches à mélanger utilisent soit un revêtement de 72 ou 52 TPIs. Dans le mesure où j’aime bien utiliser la soie, l’alpaga, l’Ouessant et d’autres fibres assez fines, j’ai décidé de commander un revêtement à dents de 90 TPI. On verra si j’ai fait le bon choix ou non au niveau TPI.
J’ai commandé un morceau de revêtement à dents de 30 cm (12 pouces) de longueur.
Une petite semaine après avoir commandé le revêtement à dents, je l’ai reçu par la poste.
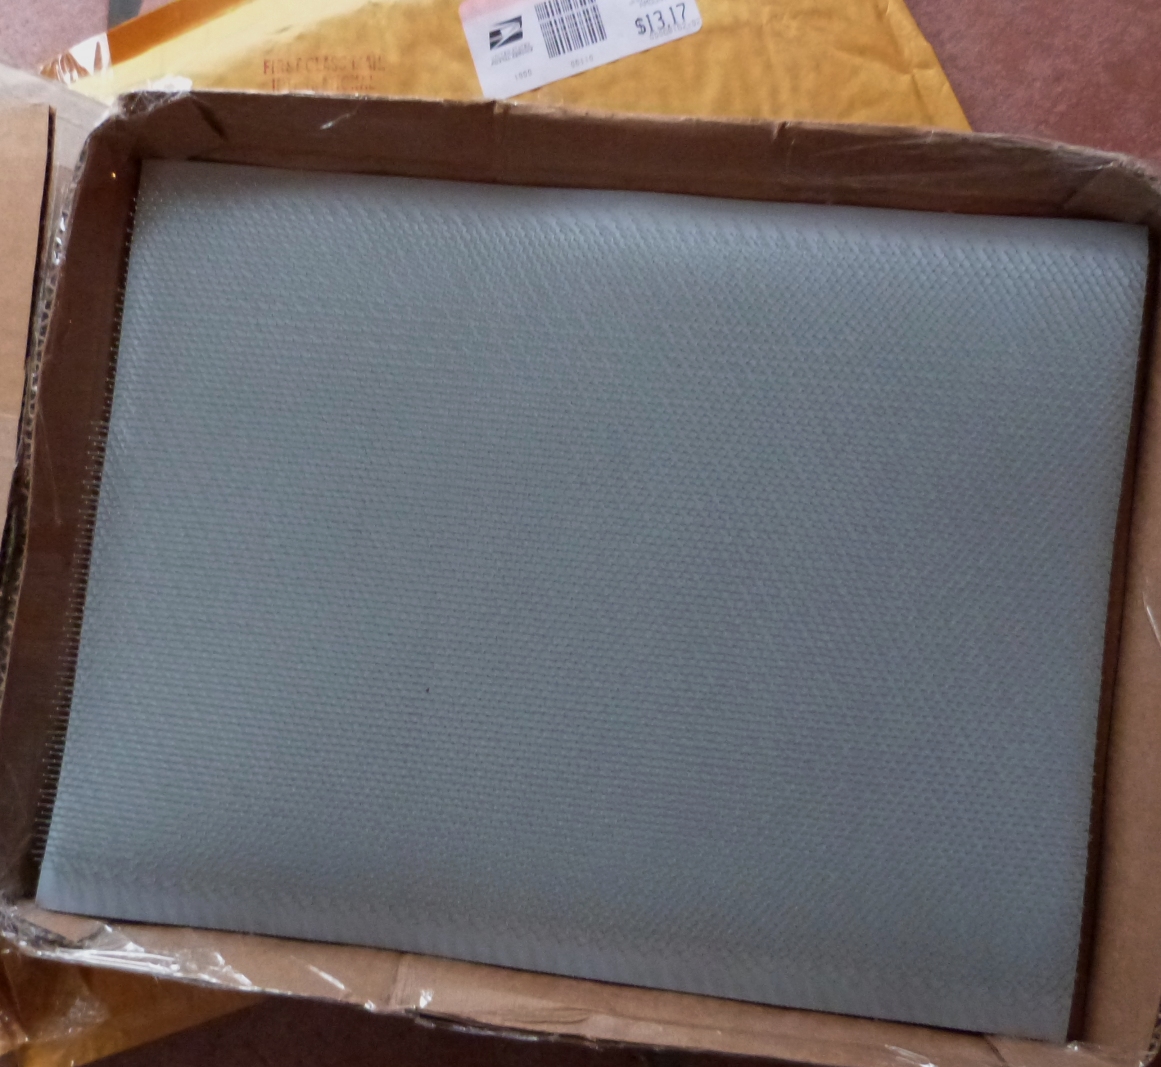
Well packed, my carding cloth arrived in perfect condition, cut to order !
Bien emballé, il est arrivé dans un état parfait et coupé à la taille souhaitée.
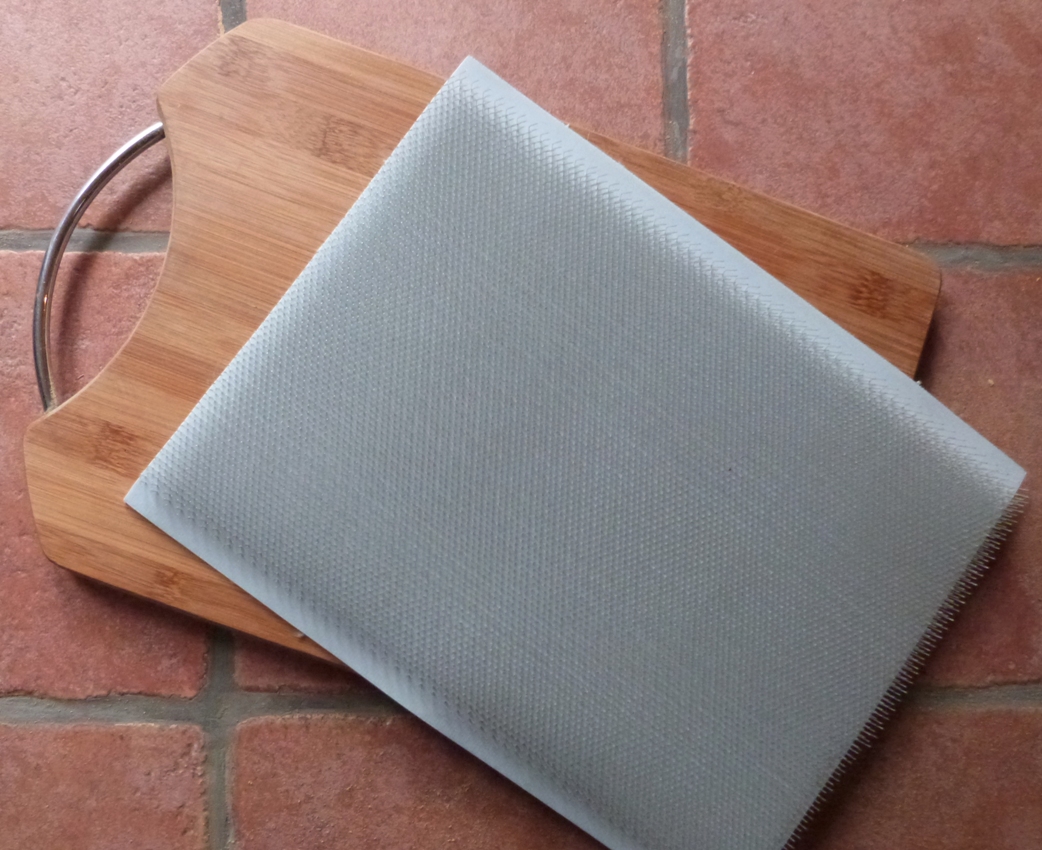
On both sides of the length of the carding cloth there is a slight margin of approx 3/8 th of an inch where there are no tines. This margin will prove to be quite useful because after glueing the carding cloth to the board, we will then staple the cloth to the board.
Sur les deux côtés il y a une petite marge d’à peu près 1cm. Cette marge s’avérera très utile, car après avoir collé le revêtement à dents sur la planche, il nous faut l’agrafer.
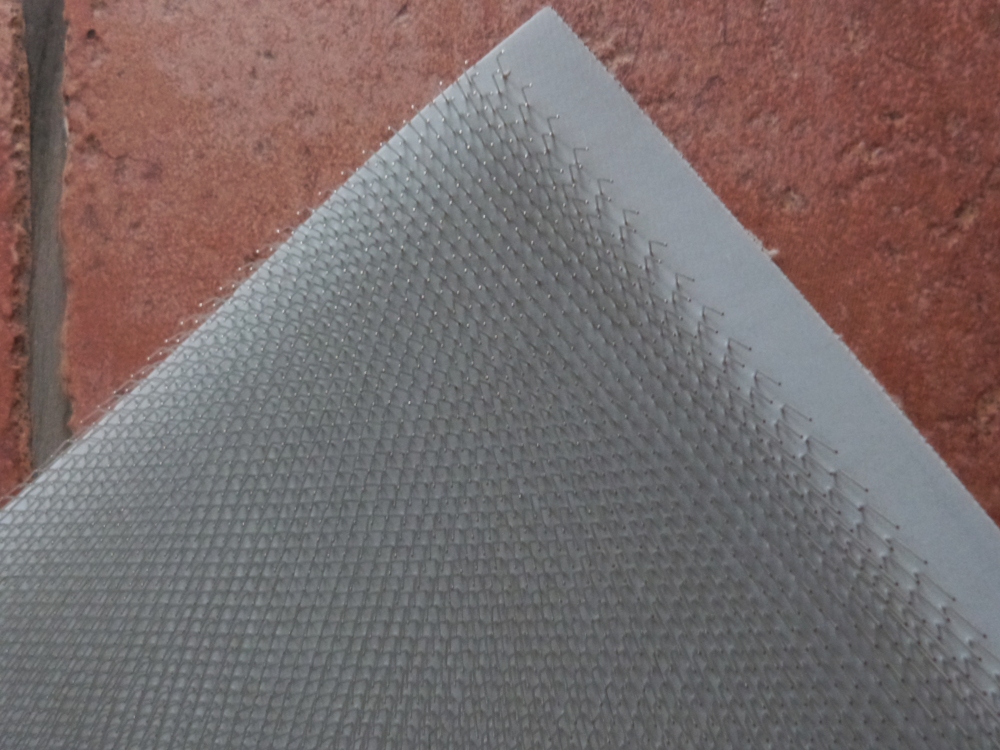
Yet the two cut ends do present a bit of a problem. Essentially, the tines go all the way to the very edge of the carding cloth and don’t leave us any room to staple the two cut edges.
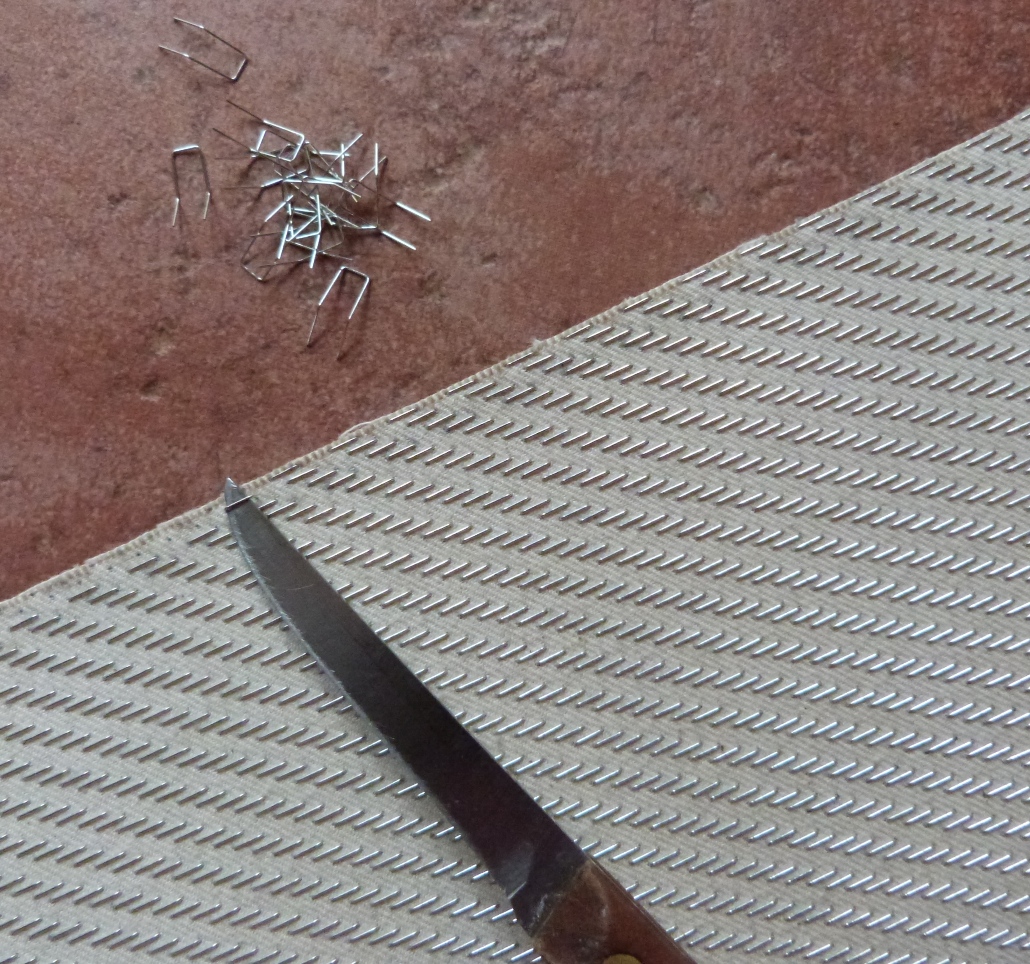
In order to make a little space for stapling, we need to remove two rows of tines from each cut end. This is really easy to do and it only took me about 5 minutes! First, turn over the carding cloth. Then, with a small knife, slip the blade of the knife under a staple which forms two tines. Gently pull out the staple. I think I removed about 100 staples from each end of the carding cloth.
Pourtant, les deux bouts coupés nous posent un petit problème. Effectivement, les dents vont jusqu’au bord du morceau de revêtement à dents et ne nous laissent pas assez de place pour agrafer ces deux côtés-là.
Pour récupérer un peu d’espace pour agrafer ces deux bouts, il faut enlever deux rangs de dents de chaque côté. C’est très facile à faire : il m’a fallu moins de 5 minutes pour le faire. D’abord, il faut retourner le revêtement à dents. Puis, avec un petit couteau bien pointu, glisser le point du couteau sous l’agrafe qui forme deux des dents et doucement enlever l’agrafe. Je pense avoir enlevé à peu près 100 agrafes de chaque côté.
Now that the carding cloth is ready, we need to prepare the wooden board. Essentially, it’s important that the board is clean and preferably newly sanded so that we can be sure that the glue will hold well.
For this project I’ve used a special fabric glue by SADER which is available in France. If you live in the States, Ron from Fancy Kitty has suggested that you “use 3M super 77 spray glue. You can purchase it at any WalMart or Home Supply store. It spays on, remains tacky, and is compatible with all carding cloth backing.”
Maintenant que le revêtement est prêt, il faut penser à la planche en bois. Effectivement, il faut qu’elle soit propre et de préférence nouvellement poncée pour assurer que le collage tient correctement.
Pour ce projet, j’ai utilisé la colle SADER, spéciale couture facile.
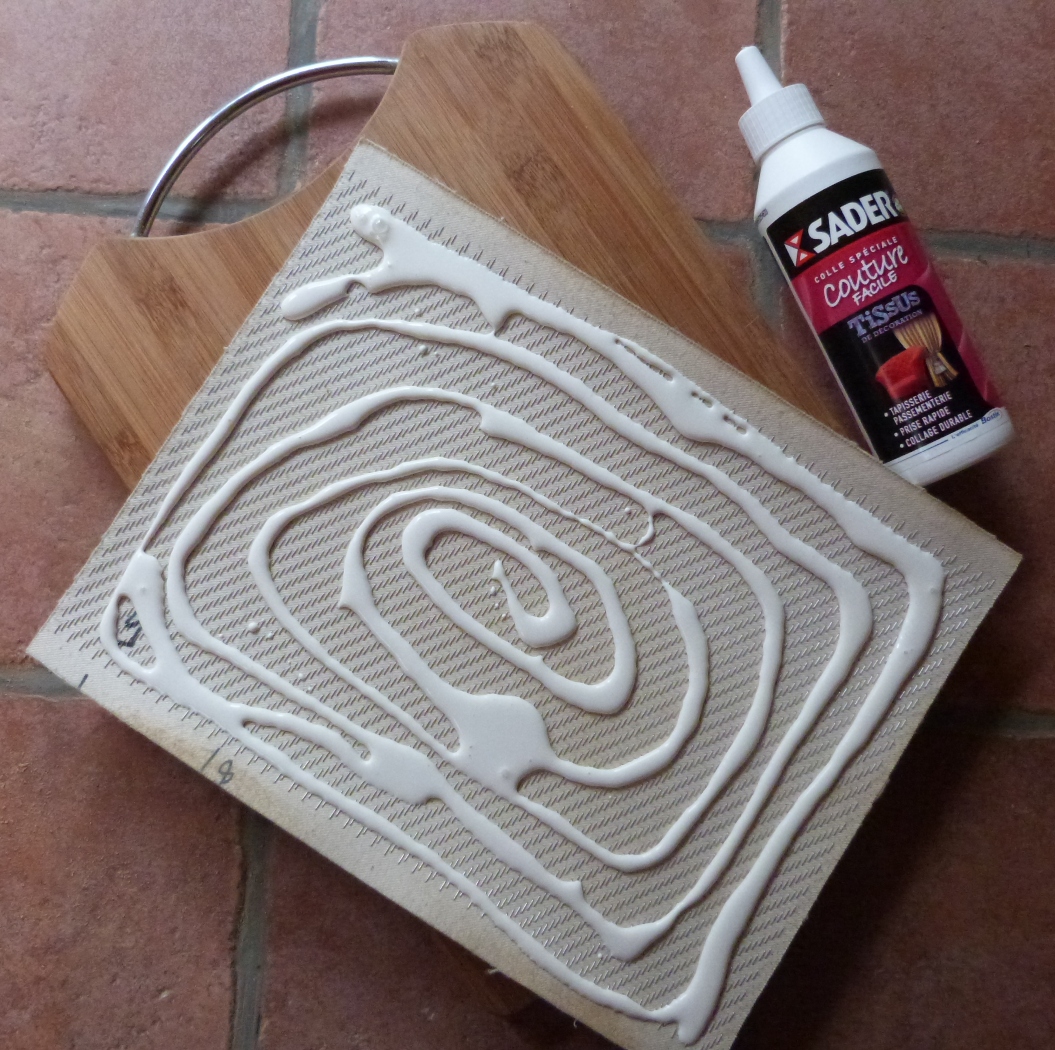
I glued the back of the carding cloth, then I placed the cloth on the wooden board. I pressed the carding cloth on the board with my hands, then I carefully cleaned up any excess glue.
J’ai déposé de la colle au dos du revêtement à dents, puis j’ai mis le revêtement encollé sur la planche en bois. Avec les mains, j’ai pressé le revêtement contre la planche; puis j’ai soigneusement nettoyé le petit peu de colle qui dépassait sur les bords.
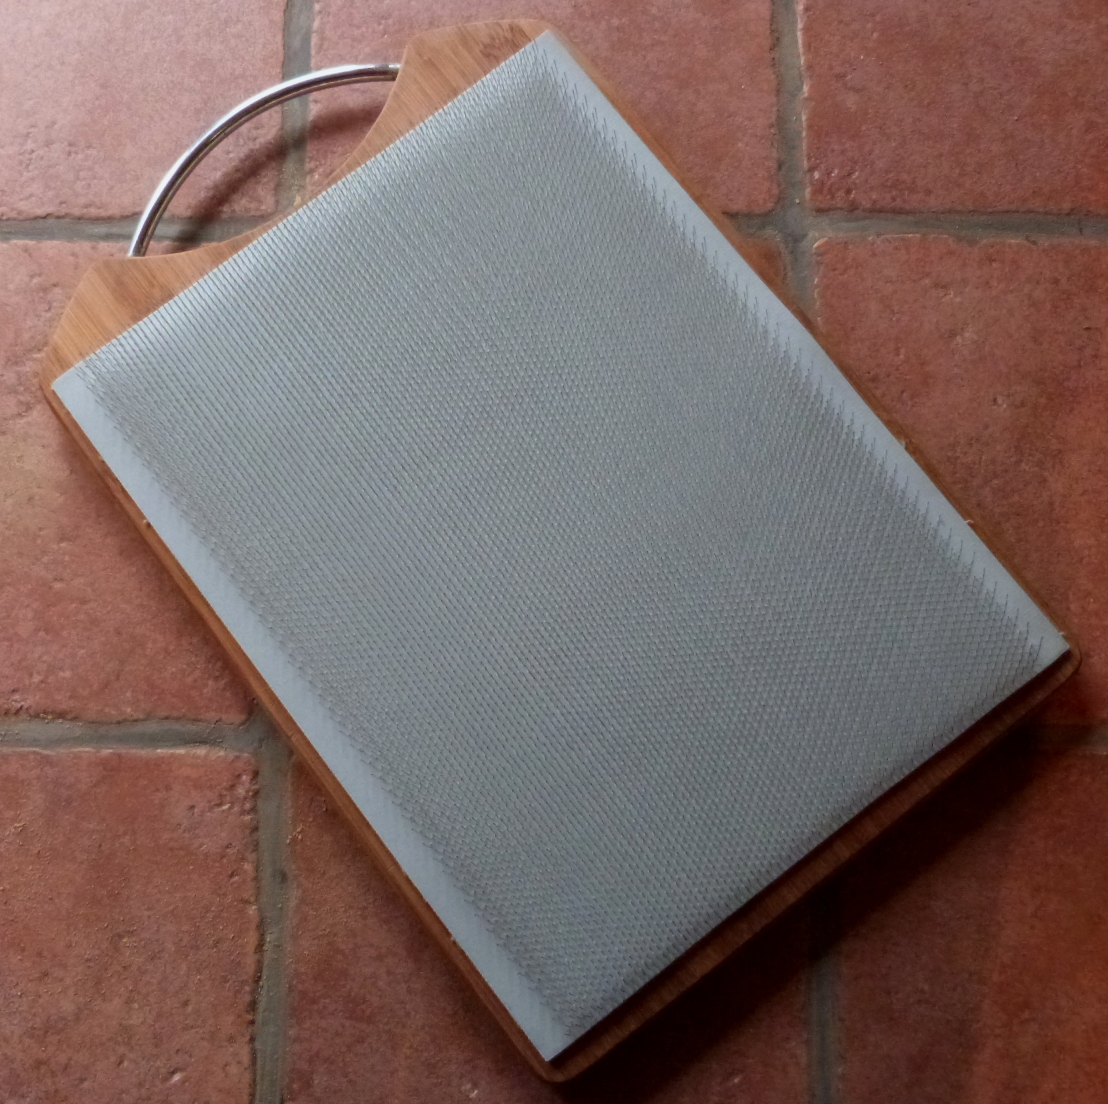
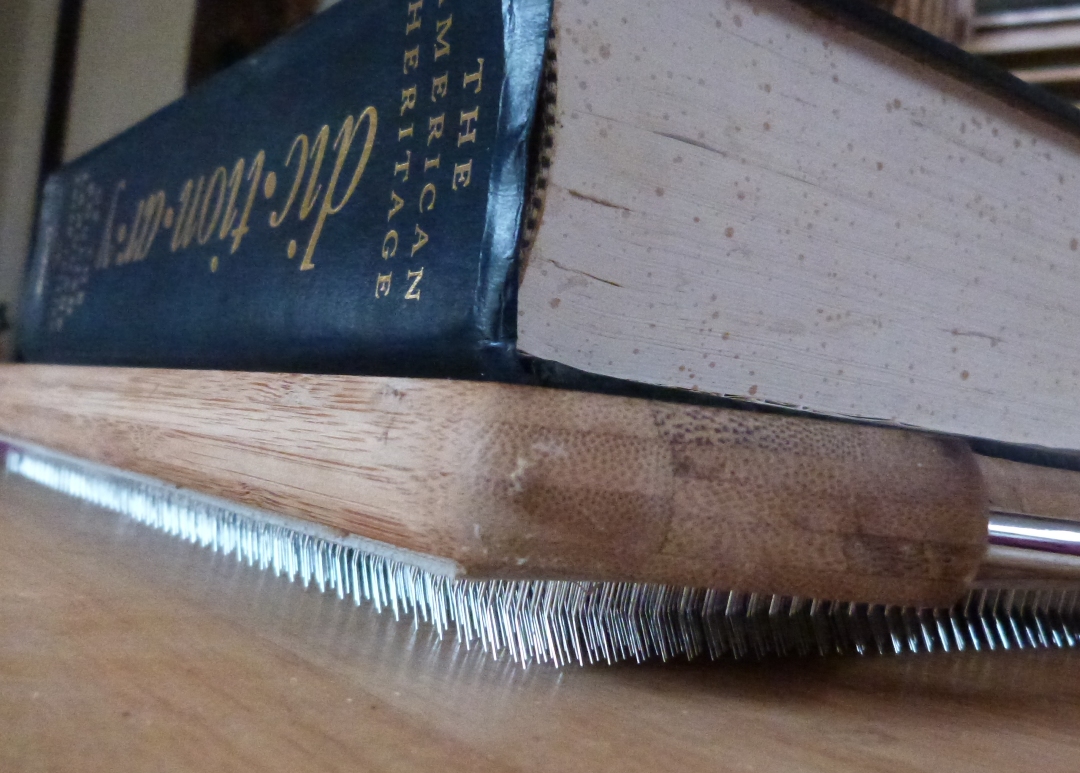
Now, turn the board over with teeth down onto a firm, flat surface. Put a book or other heavy object on the board. Then you need to let the glue dry for 24 hours.
Ensuite, il faut retourner la planche à mélanger et la poser, dents en bas, sur une surface plate. Mettre un livre de quelques kilos sur la planche. Puis, il faut laisser sécher la colle pendant 24 heures.
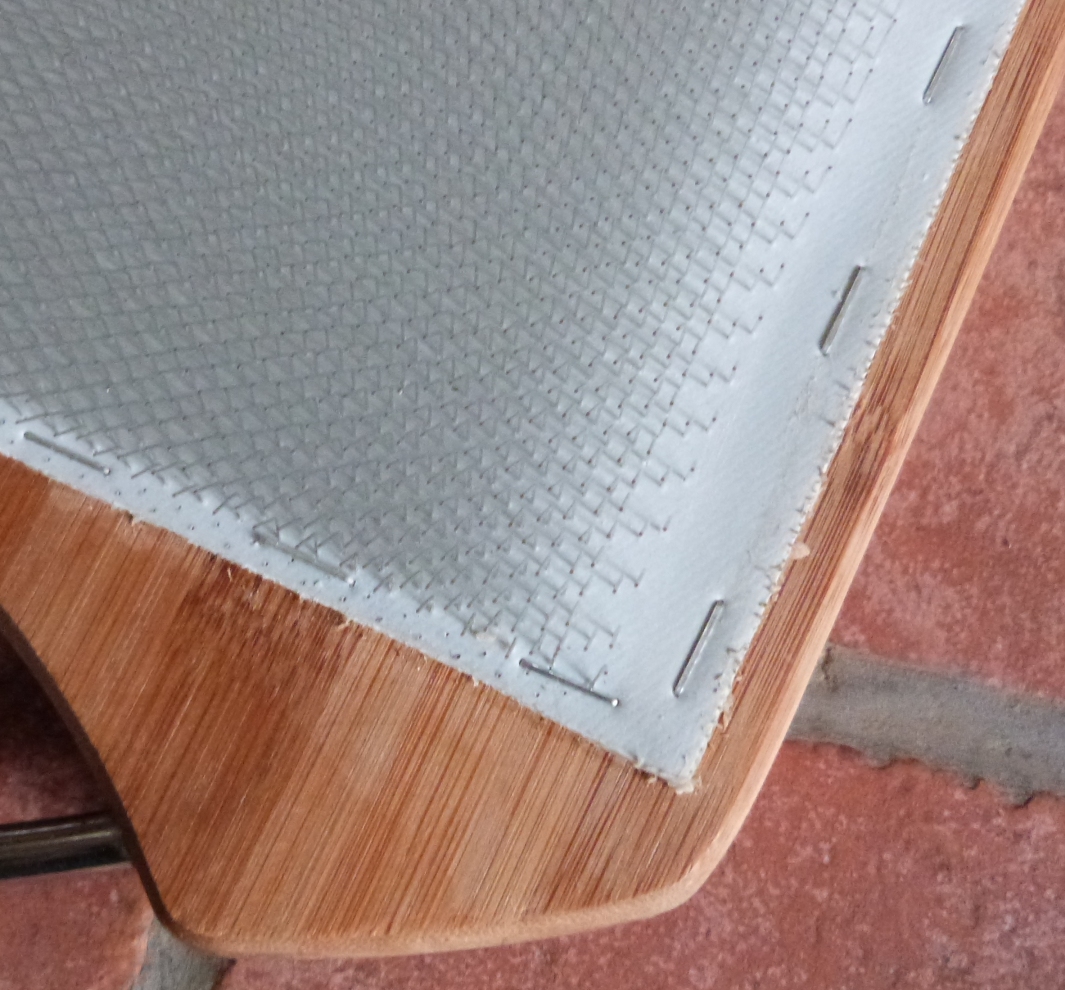
This glue has worked really well. After drying, I had the impression that I really didn’t need to actually staple the carding cloth to the board. That being said, just to be sure, I ended up stapling.
Cette colle marche à merveille. Après séchage j’ai eu l’impression de ne pas vraiment avoir besoin d’agrafer le revêtement à la planche. Ceci dit, pour solidifier le tout, j’ai fini par l’agrafer.
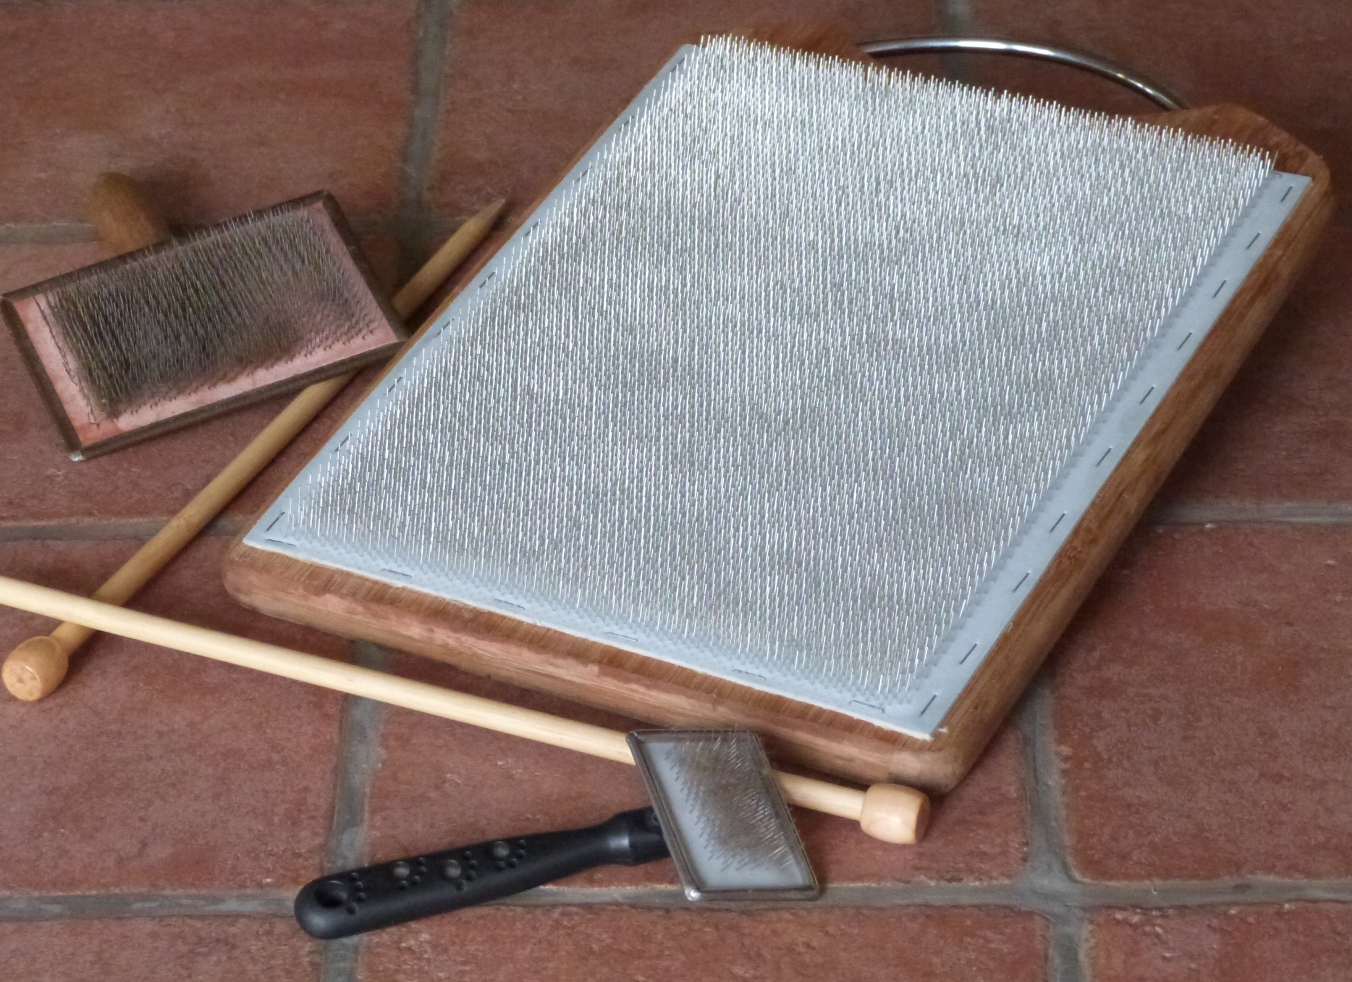
Am I ever happy !
I’ve just finished this little DIY project !
I have a beautiful blending board that’s cost me 65 euros and one hour of work.
That’s not bad, is it ?
Please note that I didn’t make a keel for this board as I plan on using it on a table top and not on my lap. That being said, I can always add one later if I think it necessary. We’ll have to see.
Que je suis contente !
Ce petit projet de bricolage s’achève !
J’ai une belle planche à mélanger qui m’a coûté 65 euros et à peu près une heure de travail.
C’est pas mal, non ?
Noter que j’ai fait un planche à mélanger sans “quille” car je compte l’utiliser sur une table et non pas sur les genoux. Je peux toujours en ajouter une si j’en ai besoin. On verra.
Coming up next …
a few dreamy fiber blends (I hope) made with my new blending board …
… to be continued …
À très bientôt …
avec quelques mélanges de rêve (j’espère !!) réalisés avec ma nouvelle planche …
…à suivre..








Very nice
Thank you !
Diane
Génial votre partage ! Un grand merci…
L’avez-vous utiliser depuis ? Est-ce que le tout s’avère aussi solide qu’espéré ?
Merci en tout cas.
Merci beaucoup Anne.
Depuis, je l’ai utilisée pas mal pour plusieurs projets.
(Vous pouvez utilisé –blending board– pour faire une recherche sur le blog)
La planche est bien solide … je n’ai pas eu le moindre prolbème.
Cordialement, Diane
Génial comme idée !
Je découvre votre blog aujourd’hui incroyable 😍
Merci et bienvenue à vous ! 🙂