De la Toison au Tricot n° 161 : Un fil « câblé »
A couple of years ago, I came up with the idea of spinning a 2-ply yarn : One ply was black Ouessant wool and the other ply was a jewel-toned silk. I have to admit, that after plying the two together, I was rather disappointed.
Basically, I had envisioned a very different yarn. And without much delay, these two skeins of yarn, along with two bobbins of silk quickly found their way to the back of the closet !
Il y a quelques années, j’ai eu l’idée de faire un fil à deux brins, dont un en laine Ouessant noire et un en soie teinte avec une palette de couleurs qui rappellent les pierres précieuses. Il faut admettre qu’après avoir retordu les deux brins ensemble, j’étais assez déçue.
Bref, dans ma tête j’avais imaginé un fil autre que celui ainsi produit ! Alors, les deux écheveaux, ainsi que deux bobines de soie filée, ont été vite relégués au fond de l’armoire !

But sometimes you have to be patient, knowing that sooner or later, you will be inspired !
In this case, inspiration came my way through the work of Judith MacKenzie and Jacey Boggs.
Pourtant, des fois dans la vie il faut savoir patienter, car tôt ou tard l’inspiration arrive !
Dans ce cas, l’inspiration m’est arrivée par le biais de Judith MacKenzie et Jacey Boggs.

To be quite honest, I’ve never really been a fan of so-called art yarn. Even if these yarns can look beautiful and seductive, I’ve found that they often lack structural integrity. So normally I wouldn’t find a book like Spin Art : Mastering the Craft of Spinning Textured Yarn by Jacey to be very tempting. But fortunately, despite my misgivings, I went ahead and purchased a copy.
Jacey Boggs’ approach to creating “textured yarn” is based on the mastery of spinning techniques, which enables the spinner to create yarns with structural integrity. Boggs introduces us to a number of different types of art yarn and then gives step by step instructions on how to create each type. Additionally, the book comes with a DVD, demonstrating all of the techniques illustrated in the book.
Pour être honnête, je n’ai jamais été une fan des fils fantaisistes du genre « art yarn ». Même si ces fils ont une allure séduisante, j’estime personnellement, qu’ils manquent très souvent d’intégrité structurale. C’est vrai qu’à priori le livre Spin Art : Mastering the Craft of Spinning Textured Yarn de Jacey Boggs ne m’aurait pas tenté. Heureusement, j’ai eu quand-même le bon réflexe de l’acheter.
L’approche de Jacey Boggs s’appuie sur une bonne maîtrise des techniques du filage pour produire un fil doté d’intégrité structurale. Boggs nous présente toute une série de fils fantaisistes et nous guide pas à pas à les réaliser. D’autre part, le livre est accompagné d’un DVD qui montre l’ensemble des techniques illustrées dans le livre.

At the same time, I have to say that Judith MacKenzie’s DVD, The Gentle Art of Plying, is one of my all time favorites. In my opinion, every serious spinner should have a copy of this DVD in their library. MacKenzie explains the importance of plying, why we should ply our yarns, and how we can ply to create a wide variety of yarns.
MacKenzie’s experience and expertise puts her in a class by herself. Additionally, her reassuring, calm style makes this DVD a real pleasure to watch.
The first time I watched MacKenzie’s DVD, I remembered her discussion about making cabled yarn. Then a few years later, when reading Boggs’ book, it suddenly clicked !
Yes … at that very moment, I knew just what I needed to do with those skeins of black Ouessant wool/silk that were hidden away in the closet. Why not try creating a cabled yarn ?
A cabled yarn has 4 plies. But it is not a 4-ply yarn. Rather, it’s two 2-ply yarns that have been plied together.
There are 3 steps for making a cabled yarn :
1. First, you will need 4 bobbins of wool. Make sure that all of the singles on the 4 bobbins have been spun in the same direction : either Z spun (to the right), or S spun (to the left).
2. Next, ply 2 bobbins together in the opposite direction : either S plied (to the left), or Z plied (to the right). It is very important that you over-ply. You are not aiming for a balanced yarn, but rather a yarn with too much ply twist. Do the same with the second pair of bobbins.
3. Finally, ply the two over-plied bobbins together. Again, you will need to ply in the opposite direction. In other words, if you Z spun your singles (to the right) in the first step, you will need to ply to the left (S ply) in the second step, then finish by plying both plied yarns together to the right (Z plied) in the third step.
En même temps, j’apprécie énormément The Gentle Art of Plying, un DVD de Judith MacKenzie. À mon avis, la bibliothèque de chaque fileuse sérieuse doit comprendre ce DVD. MacKenzie nous explique l’importance du retordage, pourquoi nous devons retordre nos fils, et comment retordre pour créer une grande diversité de fils.
L’expertise de MacKenzie est vraiment hors pair ! D’autre part, son style rassurant et calme fait en sort que ce DVD est un véritable délice.
La première fois que j’ai regardé le DVD de MacKenzie, j’ai bien noté son explication sur les fils dits « câblés ». Quelques années plus tard, lors du lecture du livre de Boggs, j’ai eu le petit déclic !
Oui … à partir de ce moment, je savais ce qu’il faut faire avec les écheveaux laine Ouessant noire/soie planqués dans l’armoire. Pourquoi ne pas tenter un fil câblé ?
Un fil câblé est un fil à quatre brins. Mais il ne s’agit pas de quatre brins retordus ensemble. C’est plutôt 2 fils à 2 brins retordus ensemble.
Il y a 3 étapes pour réaliser un fil câblé :
1. D’abord, il faut filer quatre bobines de laine (ou bien d’autres fibres). Faire attention que toutes les 4 bobines soient filées dans le même sens : soit Z (à droite), soit S (à gauche).
2. En suite, retordre 2 bobines ensemble, en sens inverse : soit S (à gauche), soit Z (à droite). Noter qu’il faut que ce fil retordu soit fortement entortillé. Puis faire la même chose pour la deuxième paire de bobines.
3. Finalement, retordre ensemble les deux fils qu’on vient de retordre séparément. De nouveau, il faut retordre en sens inverse. C’est à dire, si vous avez filé à droit (Z) dans le première étape, il faut retordre à gauche (S) dans le deuxième étape, et finir par retordre à droite (Z) dans la troisième étape.

Keep in mind that it is really important to over-ply the 2-ply skeins (step 2). I had to re-ply my skeins of black Ouessant wool/silk to make sure that they had enough twist energy in them.
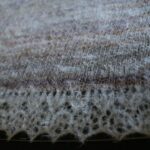
After plying the two 2-ply skeins together, I ended up with a beautiful round yarn made up of 4 single threads. I’m really very pleased with the result.
Noter qu’il est indispensable que les fils à 2 brins (étape 2) soit « très fortement » entortillés. Pour mes écheveaux laine Ouessant noire/soie, j’ai été obligée de retordre de nouveau mes fils pour assurer qu’ils soient bien entortillés.
Après avoir retordu ensemble les deux fils à 2 brins, j’ai finis par avoir un beau fil bien rond à 4 fils. Je suis très contente du résultat !

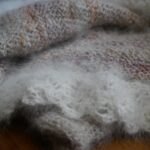
Insofar as I had a fair amount of silk left over, I decided to dye some white Ouessant wool to make a color coordinated yarn.
Dans la mesure où il me restait pas mal de soie, j’ai décidé de teindre un peu de laine Ouessant blanche pour faire un écheveau de laine assorti.

Another Ouessant/silk cabled yarn. I have to say that this yarn really turned out so nicely. The jewel-like colors and textures almost sparkle !
Encore, un fil câblé Ouessant/soie. Il faut dire qu’il est vraiment très beau : le jeu des couleurs et de textures est presque chatoyant !

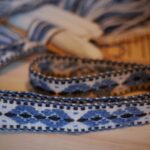
Now I’ve got another problem : What am I going to do with these two lovely skeins of cabled Ouessant/silk yarn ?
Pourtant, un nouveau problème se pose : que faire avec ces deux jolis écheveaux de laine câblée Ouessant/soie ?

… to be continued …
… à suivre …


")